A fun project for the tea-lovers among us. Also a great gift. This pattern fits a 4-6 cup teapot but you can scale it up or down as desired.

What you’ll need:
- Fabric (Note: ordering this particular fabric takes up to two weeks, so plan ahead!)
- Downloadable pattern
- Light yellow thread (or light blue if you’re using the fabric with the blue background)
- 1 package of light yellow or blue Double-Fold binding. Make sure it’s Double-Fold as opposed to Single-Fold; otherwise it won’t cover the bottom edge correctly. You can use a contrasting color instead if you like.
- Pins
- Scissors
- Iron
- Sewing machine — it’s much easier if you have one, but you can do it by hand too.
Don’t be scared by all the steps! There are really just four:
- Buy the material
- Cut out the pieces
- Sew the main part together
- Sew on the seam binding (the edging piece that goes around the bottom)

- Buy your hedgehog fabric:
- Go to Spoonflower.com and order 1 yard of hedgehog-in-a-teacup fabric with a yellow or blue background.
- The order will take up to two weeks to arrive—Spoonflower does print-on-demand rather than warehousing.
- Buy your quilted insulating fabric:
- Go to Voguefabrics.com and order 1 yard of ThermaFlec fabric. (This is what’s shown in the images below.)
- The order will take about 1-1/2 weeks to arrive.
- Or go to SeattleFabrics.com and order 0.75 yard of Thinsulate fabric. You will have LOADS left over but I bet you can find something else you want to insulate.

- Download the three parts of the pattern: Left Middle Right
Print them out on 8-1/2 x 11 paper and tape them together.
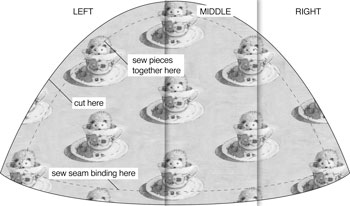
- Fold the hedgehog fabric in half lengthwise, making sure that the hedgehogs are matched up. (This may mean that you’re not folding down the exact middle of the fabric.)
- Pin the pattern on the fabric so that the hedgehogs line up as in the pattern. Make sure your hedgehogs are lined up straight at the bottom. Straight as in not-crooked; no-one cares if your hedgehogs are gay.
- Cut out two pieces carefully.
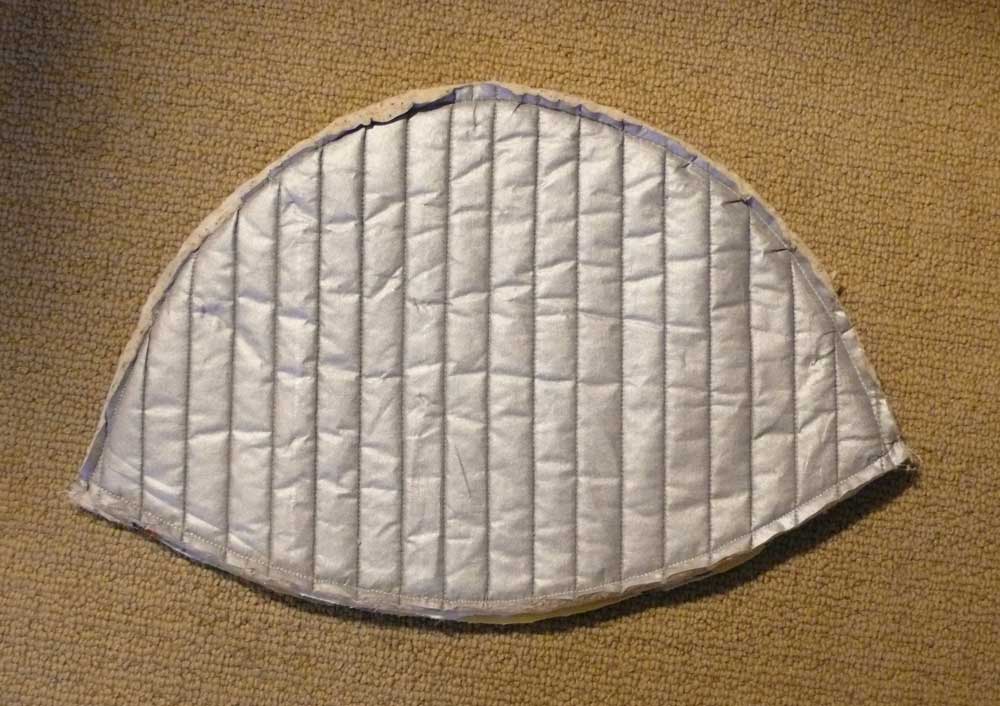
- Cut out two pieces of the quilted fabric, making sure that the quilting lines are vertical and matched up.

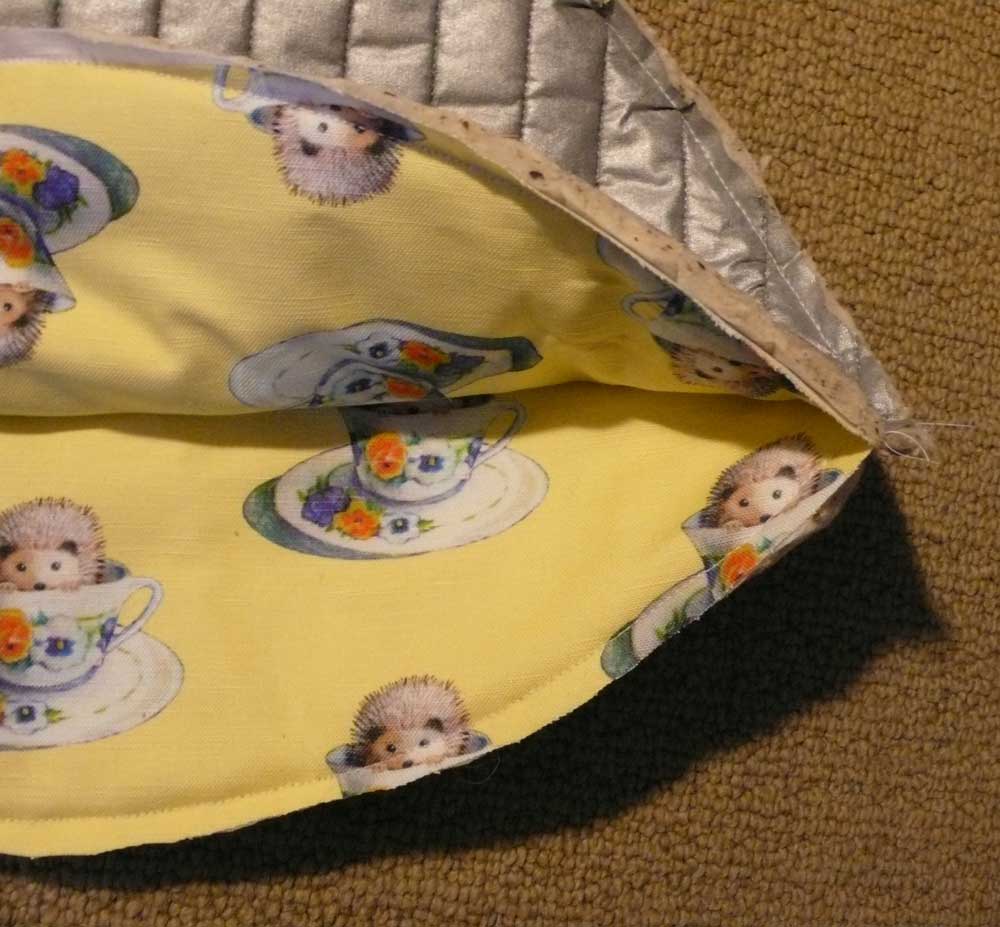
- Assemble the cozy: put one piece of quilted fabric silver side down, then one piece of hedgehog fabric facing up, then the other hedgehog fabric facing down, then the other quilted fabric silver side up. Pin through all layers. Sew only around the more-curved top edge (not across the less-curved bottom) through all layers with about a 3/8″ margin.
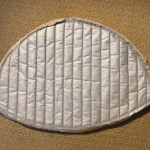
- Turn right side out. It already looks like a tea cozy!

- Measure all the way around the open end of the tea cozy and add 1/2″. Cut the binding to this length.
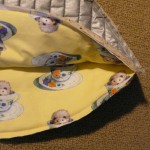
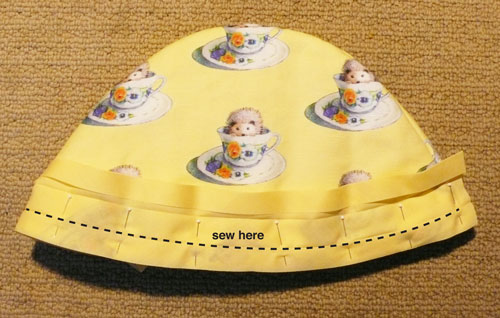
- Open out one side of the binding and line up the OUTSIDE of the edge of the fold with the OUTSIDE of the unfinished edge of the open end of the tea cozy, matching up the raw edges. Pin in place, leaving the extra 1/2″ free.
- Sew with about a 3/8″ margin from the edge, all the way around except for the extra 1/2″.
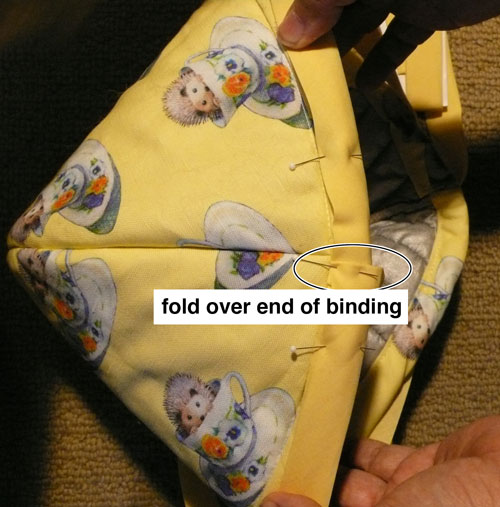
- Fold the binding to the inside with the edge folded in. Pin in place. Don’t sew yet!
- Fold in the end of the binding 1/4″ and overlap it over the other end. Pin in place, THEN sew.
- Here’s the last step! From the OUTSIDE, sew carefully RIGHT IN THE “DITCH” OF THE SEAM so the stitching catches the folded-over binding on the INSIDE.
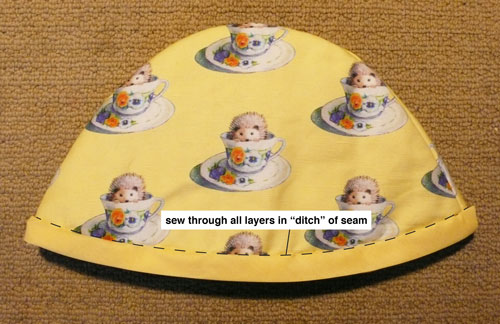
That’s it! Because of the insulating properties of the lining, this tea cozy will keep your teapot warm for several hours, for realz.
Note: If you use the quilted fabric, hand-wash the tea cozy only; if you machine-wash it, the reflective coating will come off and it will be less effective. I think the Thinsulate would be OK, but the hedgehog fabric might shrink or get twisted. So just hand-wash and let air-dry!

